Hi! I am Jonie Lim from Malaysia. This is my second week assignment for Introduction to Music Production on Coursera. I am choosing the topic to record a MIDI in DAW (Digital Audio Workstation). I am using GarageBand as my DAW. I am using GarageBand 5. Yes, it is a very old version, my Macbook is currently 5 years old. :P
Firstly, I am creating a test project in GarageBand. I set the Count In as the click and countoff (this is what I understand what it is). I also turned on the Metronome so I could follow the tempo of the project that I have set, which is 120.
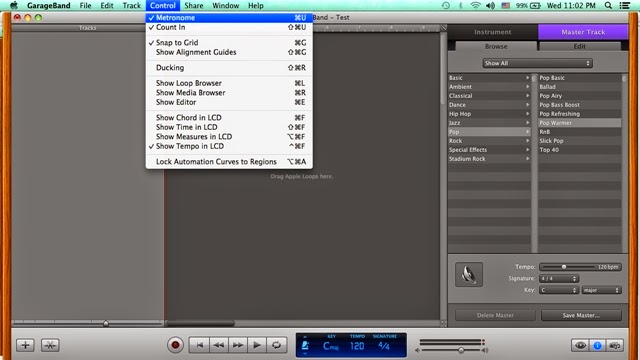 |
| Setting the Count In and Metronome |
Then, I created a new track selecting Software Instrument.
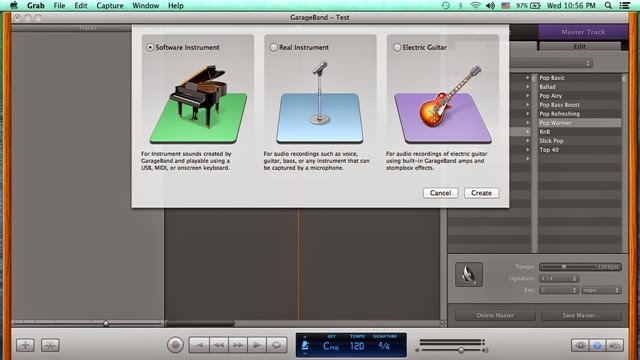 |
| Creating a software instrument track |
I have my MIDI controller connected to my Macbook. Got this MIDI controller last year when I have a chance to go to US. Haven't work out anything from it, yet. Thanks to this course, it help me to find ways to play with this! :D
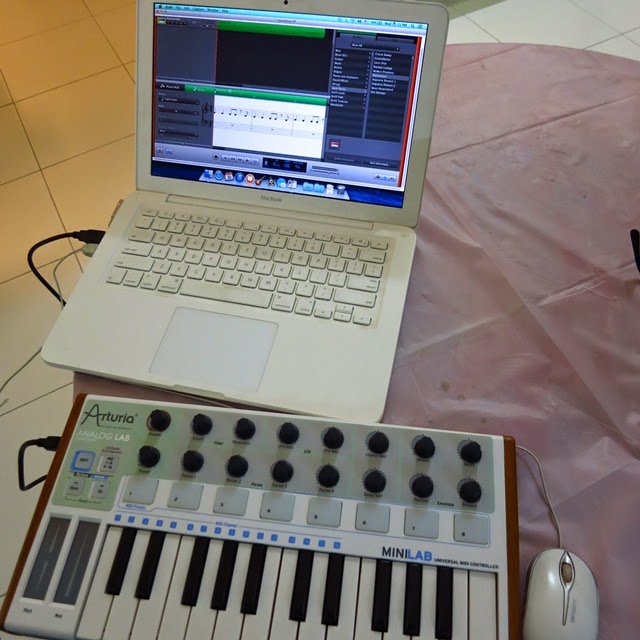 |
| Connecting MIDI controller to DAW |
I can select which software instrument to be used from the right menu on the right of GarageBand.
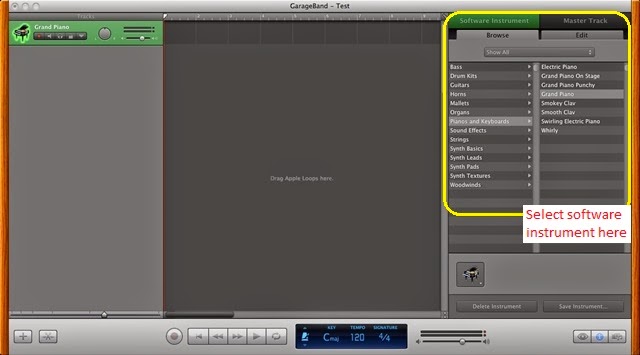 |
| Selecting software instrument |
I selected the Planetarium from Synth Basics category. GarageBand will change the track name according to the selection automatically. I still can change the track name before recording. However, whenever a new software instrument selected on the same track, it will be renamed again, automatically.
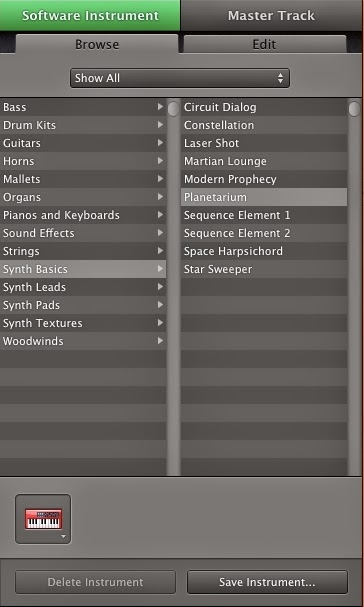 |
| Selected software instrument for the MIDI track |
Finally, I selected the track that I wanted to record to, and click the record button.
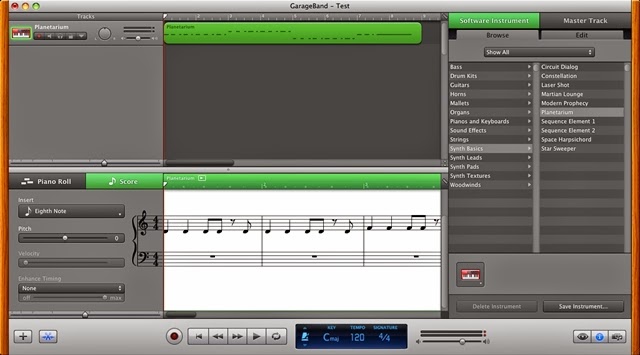 |
| Track editor : showing score view |
As we know, MIDI is something like a real time score, which can be view in GarageBand right away by showing the track editor. Editing the score actually will change the note played by the software instrument.
You can view it in piano roll as well. See the following screen shot.
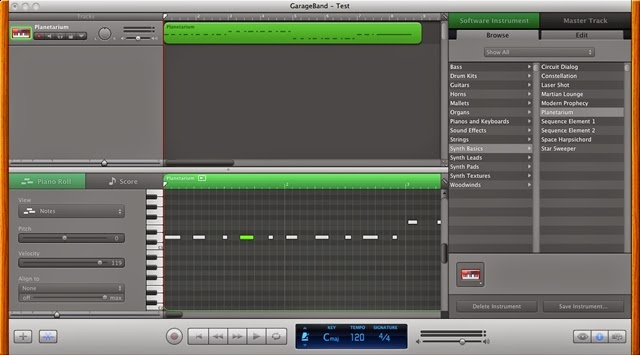 |
| Track editor : showing piano roll view |
To change the velocity of the note(s) in the MIDI track. Firstly, select the note(s), then go the the left pane of the track editor, modify the velocity of the selected note(s) by scroll to the left or right at the velocity control. From the illustration below, the velocity of the selected note in green is 119.
 |
| Track editor : controls |
GarageBand provide the quantize function by the "Align to" control, the control at below of the Velocity control. The off to max bar indicates the percentage of quantization mentioned in the lecture.
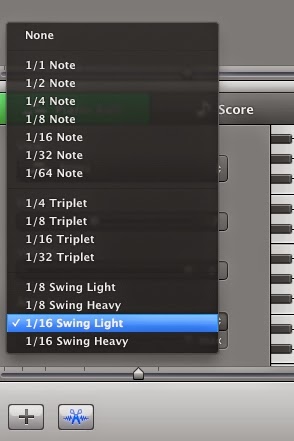 |
| Track editor : quantize the notes |
I mixed down the recording and uploaded the file to SoundCloud. This is the audio file "generated" by the software instrument that I chose in GarageBand in this blog post.
I tried to explore GarageBand on my Macbook, but it seems it is unable to perform some of the tasks mentioned in the lectures, such as colouring the track/recording, cross-fading and etc. That is why I chose this topic to discuss for this assignment. I am thinking of upgrade it, or download Audacity to proceed with this course. Probably this would help me more with my future recordings too! ;)
Thank you for taking your time to go through this blog post. Hope you enjoy reading it, as I enjoyed preparing for this. Have a great day!
Comments
Post a Comment